How to Pressure Test Water Lines
Water line failures often remain hidden until damage becomes costly and disruptive, especially when problems develop behind walls, beneath floors, or underground, where early warning signs are rare. Pressure testing water lines gives you a clear way to understand whether your plumbing can safely handle daily operating pressure without leaks. This matters during maintenance, renovations, or property evaluations because undetected weaknesses often lead to sudden failures.
Here, you will learn how licensed plumbers approach testing, what failed results reveal about pipe condition, and when professional repair becomes the safer choice.
How Professionals Pressure Test Water Lines
Licensed plumbers follow a structured process designed to protect your plumbing system and property. Each stage focuses on isolating the system, applying controlled pressure, reading results, and identifying failure points without unnecessarily stressing the pipes. Understanding how to pressure test water lines at a professional level helps you recognize why proper equipment, experience, and interpretation matter.
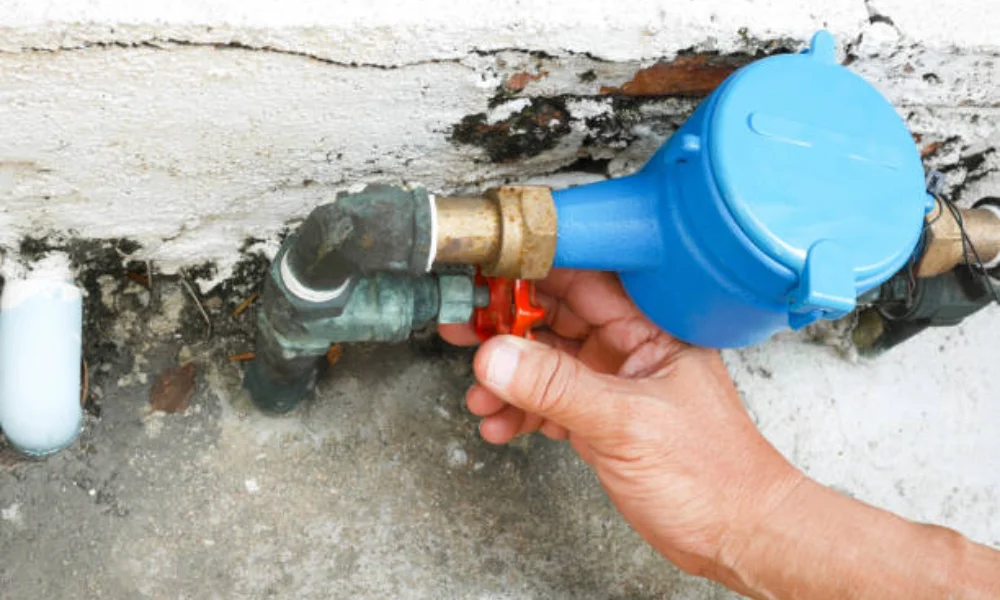
1. Shut Off Water Supply and Drain the System
First, the main water supply gets shut off to isolate the section being tested. The system is then drained to prevent trapped water from distorting pressure readings. This step matters because residual water can mask pressure loss or yield misleading results. Draining also protects fixtures from sudden stress during testing.
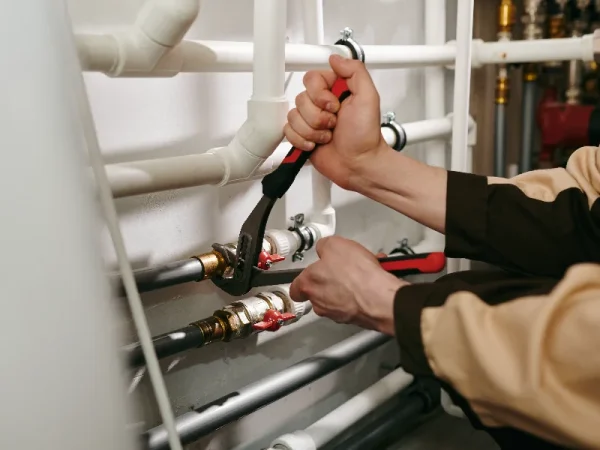
2. Install the Test Gauge or Pressure Testing Equipment
Next, a calibrated gauge or testing pump is installed at an access point. The equipment connects securely, preventing false drops caused by loose fittings. Professionals select gauges rated for residential or commercial lines, including high-pressure water line systems where standard tools fail. Proper installation ensures the reading reflects the pipe condition, not equipment error.
3. Pressurize the Line to the Required Level
The line is then pressurized to a level specified by plumbing codes or manufacturer guidelines. Pressure increases gradually to avoid shocking older pipes. This controlled rise reveals weaknesses without causing new damage. When plumbers pressure test water line systems, they never exceed safe limits, especially with aging materials like galvanized steel.
4. Monitor Pressure Readings
Once pressurized, the gauge is monitored over a set time. Stable pressure suggests intact pipes, while changes indicate problems. Reading trends matter more than a single number, which is why monitoring continues for consistency.
Gradual or Immediate Pressure Drop
A gradual pressure decline usually indicates small leaks or seepage at joints. A sudden drop suggests a larger breach, cracked pipe, or failed fitting. Professionals document the rate and timing because each pattern signals different repair needs.
Inability to Reach the Required Pressure
Sometimes the system cannot reach the target pressure. This often indicates an open valve, a severe leak, or a compromised underground section. In such cases, continuing to put pressure risks further damage.
5. Inspect Fittings, Joints, and Exposed Lines
While monitoring continues, plumbers visually inspect accessible areas. This combination of data and observations quickly narrows the failure location.
Visible Leaks Around Joints or Fixtures
Moisture, bubbling, or dripping at joints confirms seal failure. These leaks often appear before pressure readings change significantly, especially in newer installations.
Sound of Air Escaping From the Line
Hissing sounds indicate escaping air from cracks or loose connections. This audible cue often helps locate hidden issues behind walls or under floors. For concealed leaks, professionals may pair testing with methods such as those described in this guide on detecting water leaks inside walls, which supports accurate diagnosis without unnecessary demolition.
6. Document Findings and Plan Repairs
Finally, results are recorded with pressure levels, time intervals, and observed leaks. This documentation guides repair planning and helps property owners understand urgency. Clear records also support insurance claims or inspection approvals.
Signs a Water Line Fails a Pressure Test
Certain outcomes during a pressure test indicate real weaknesses in the water line, not short-term pressure changes. Shifting gauge readings, visible moisture near fittings, or audible air movement each suggest a different failure pattern that affects pipe reliability. Understanding these signs helps you interpret test results correctly and decide whether to monitor, target repairs, or proceed to full-line replacement.
Gradual or Immediate Pressure Drop
Any sustained pressure loss during the test signals a breach. Even slow drips matter because minor leaks often grow over time under daily use. Ignoring these signs leads to hidden water damage and higher repair costs.
Visible Leaks Around Joints or Fixtures
Leaks at fittings show compromised seals or corrosion. These failures often spread, affecting nearby sections. Early repair prevents structural moisture issues.
Inability To Reach the Required Pressure
Failure to reach the target pressure usually points to significant damage. This condition often appears in older systems or previously repaired lines. Continued use risks sudden pipe failure.
Sound of Air Escaping From the Line
Audible air loss confirms openings in the system. This sign frequently accompanies underground or wall-enclosed leaks. Professional location tools then become necessary.
According to the Plastics Pipe Institute, pressure testing a piping system with a liquid, most often water, is a standard step before placing it into service to check for leaks and confirm structural integrity. Pressure testing water lines with hydrostatic methods is safer and can reveal faults that might be missed with air tests.
FAQs
What Is the Standard for Pipe Pressure Testing?
Standards vary by pipe material and local code. Most residential systems are tested at a pressure above normal operating pressure for a set duration. Licensed plumbers follow code-compliant limits to protect pipes.
Can You Pressure Test Water Lines With Air?
Yes, air testing is sometimes used, especially when water use is impractical. However, air compresses more than water, increasing the risk if mishandled. Professionals control this process carefully to avoid pipe damage.
Can Weather Affect My Water Pressure?
Temperature changes can affect pipe expansion and contraction. Cold weather may slightly lower pressure readings, especially on exposed lines. Professionals account for conditions during testing.
What Time of Day Is Water Pressure Highest?
Pressure often peaks during low-demand hours, usually late at night or early morning. Municipal usage patterns influence this variation. Testing accounts for these fluctuations to ensure accurate results.
Call Anton Plumbing Heating & Cooling for Water Main Line Repair in East Brunswick, NJ
Pressure test water lines shows why accurate testing protects your home from hidden leaks and long-term damage. From isolating the system to interpreting pressure behavior, each step reveals pipe health before failures become emergencies. If testing reveals issues with a high-pressure water line or buried main, professional repair becomes critical. For trusted diagnosis and water main line repair in East Brunswick, NJ, contact Anton Plumbing Heating & Cooling to protect your plumbing system with expert care.